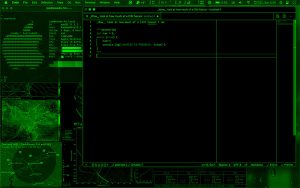
I used to use an app called Nocturne to do this on a version of OS X long ago, but now it’s just built in to the operating system.
Basically, you want to do two things:
- Enable the color filter, and slam it all the way to one color. I highly recommend green or red.
- Optional: enable high-contrast mode.
- Optional: add the accessibility menu to your menu bar to quickly toggle it on and off.
Why would you want to do this?
- It looks cool.
- Less likely that you’ll be distracted — or distracting — when on your laptop in class or at work.
- Higher contrast means you can have your laptop screen be at a lower brightness and still be able to read it.
Unlike Nocturne, the default macOS accessibility setting only acts as a color filter and doesn’t really do any color replacement, so out of the box, you’re only going to be able to set your monitor to full green, red, or blue.
